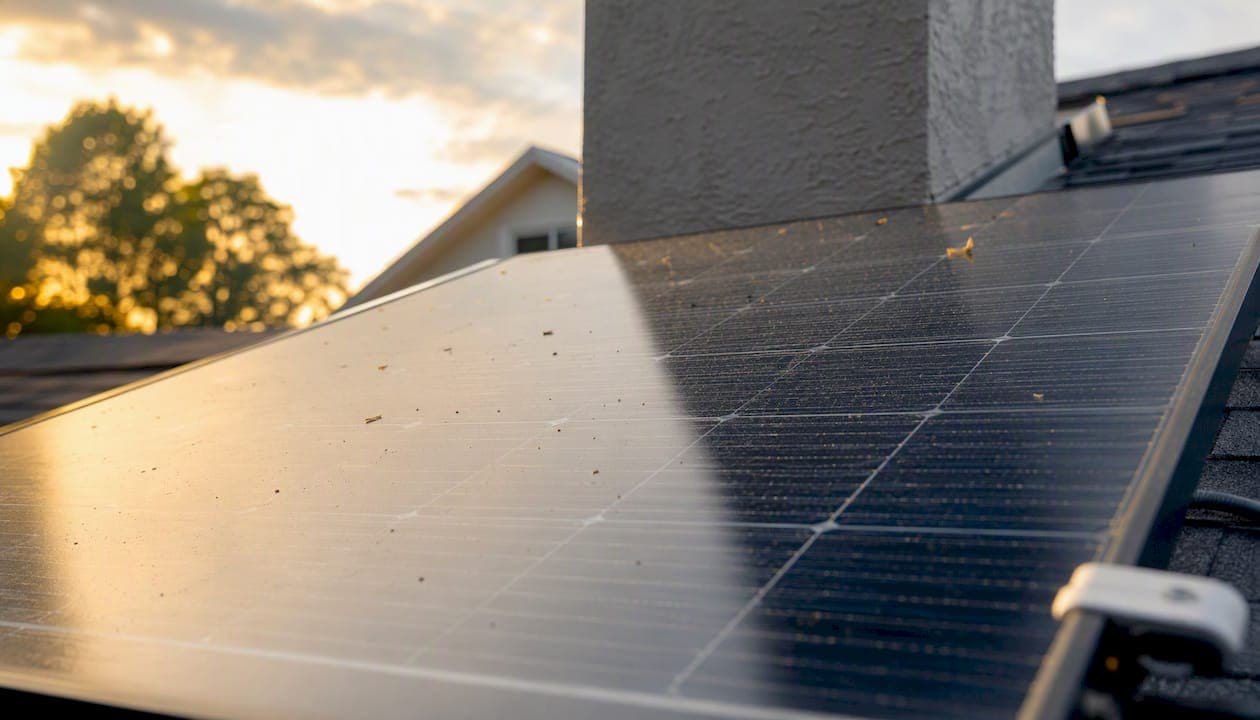
Solar panels in shade still generate electricity, but losses can be large enough to wreck your payback timeline if you don't plan around them. The single best first move: spend 30 minutes tracking shadows across your roof on a clear day, then decide whether you need a professional 3D shade analysis before signing any installation contract.
Your immediate next steps:
- Walk your roof at 9 AM, noon, and 3 PM on a sunny day and photograph every shadow that touches your panels
- If shade covers more than a small corner for more than an hour or two daily, ask your installer specifically about module-level power electronics (MLPE) and half-cut cell panels
- If your roof is heavily shaded for most of the day, consider a portable solar and battery system you can position where the sun actually reaches
SolarReviews confirms that panel technology, inverter setup, and shading duration all determine how much output you actually lose, so the details matter far more than a simple yes-or-no answer.
Key Takeaways
Solar panels in shade can still generate power, but nonlinear losses and inverter behavior mean the right hardware and a professional shade analysis are the two decisions that most determine whether a shaded solar project is worth the investment.
| Point | Details |
|---|---|
| Shading losses are nonlinear | Shading 10% of panel area can cut output 30–40% in string systems, not 10%. |
| MLPE is the most effective mitigation | Microinverters or DC optimizers prevent one shaded panel from dragging down the whole string. |
| Get a 3D analysis for moderate or heavy shade | Hour-by-hour simulation gives bankable yield numbers; static estimates routinely overstate production. |
| Heavy shade often favors alternatives | Ground mounts, community solar, or portable panels may outperform a shaded rooftop install financially. |
| Toddra portable systems fit shaded homes | LiFePO4 power stations paired with portable panels let you generate where the sun actually reaches. |
Table of Contents
- How shade reduces output in your solar panel system
- How much shade is too much for a solar project?
- How to measure and model shade on your property
- Mitigation hardware and design choices that reduce shading losses
- What empirical research says about partial shading losses
- Your step-by-step checklist before signing an installation contract
- Practical alternatives when your roof is too shaded for rooftop solar
- Quantitative guidelines on tolerable shade duration
- How panel technology affects shade performance
- How partial shade affects battery storage integration
- Cost-benefit analysis: mitigation technology versus relocation
- A realistic perspective on shade tolerance and what it actually costs you
- Portable solar and battery backup from Toddra for shaded homes
- Primary sources and further reading
- Sources
How shade reduces output in your solar panel system
Understanding the electrical chain helps you ask smarter questions and spot bad installer advice.
Every solar panel is built from individual cells wired in series. When one cell is shaded, it restricts current for every other cell in that series group, much like a single clogged lane slowing an entire highway. PV Education explains that completely shading one cell can dramatically reduce the module's output and force the shaded cell to dissipate power as heat, a condition called a hotspot.
Bypass diodes are the built-in safety response. Each diode monitors a group of cells (typically 18–24 per group in a standard 60-cell panel) and reroutes current around a shaded group when the mismatch gets large enough. That protects the panel from heat damage, but the bypassed group contributes little or no power while the diode is active. More bypass diode groups per panel means finer protection and less total loss per shading event.
There is also a meaningful difference between hard shade and soft shade. Hard shade comes from a nearby chimney, dormer, or tree branch casting a sharp-edged shadow. It triggers bypass diodes abruptly and produces disproportionate drops in string-inverter systems. Soft or diffuse shade from overcast skies or distant foliage reduces current more gradually and may not trigger diodes at all, so the loss is more linear and usually smaller.
Field data from SurgePV shows that shading just 10% of a panel's surface can cut output by 30–40% in a standard string-inverter system. That nonlinear relationship is the core reason shade deserves serious attention before you commit to a rooftop layout.
Pro Tip: Ask your installer how many bypass diode groups each proposed panel model contains. A panel with three groups (standard) loses roughly one-third of its output when one group is bypassed; a half-cut panel with six groups loses roughly one-sixth.
How much shade is too much for a solar project?
Professionals treat it as a flag for further analysis, not an engineering threshold. A full-year 3D shading simulation gives far more reliable numbers for borderline cases.
Practically, shade falls into three buckets:
- Light shading: A chimney shadow or small branch touches one corner of the array for less than an hour daily. Annual production loss is typically modest, and standard MLPE or half-cut cell panels handle it well without major cost impact.
- Moderate shading: One or two panels are shaded for two to four hours on most days. Annual losses become meaningful, payback extends noticeably, and MLPE is strongly worth the added cost.
- Heavy shading: Large portions of the roof are shaded for most of the productive solar window (roughly 9 AM to 3 PM). Even with the best mitigation hardware, the economics often don't work for a rooftop install. Alternatives deserve serious consideration.
PVsyst rooftop studies on ScienceDirect show that array tilt, azimuth, and row spacing all affect how often shading occurs and directly shift the payback period. A poorly designed layout on a moderately shaded roof can perform as badly as a heavily shaded one.
Pro Tip: Before accepting any installer's production estimate, ask which shading loss figure they used in their simulation and whether it came from a static calculation or an hour-by-hour 3D model. The difference can be several percentage points of annual yield.
How to measure and model shade on your property
A structured shade assessment protects you from an expensive mistake.
DIY checks you can do this weekend:
- Use a free smartphone app such as SunSurveyor or Sun Seeker to trace the sun's path across your roof at different times of year
- Take a 360-degree horizon photo from the center of your proposed array location and note anything above 15 degrees of elevation
- Record the start and end time of every shadow that crosses the roof on a clear day in each season if possible, or at least in late fall when sun angles are lowest
When to bring in design software or a professional:
If your DIY check reveals more than occasional shading, the next step is a proper shade analysis. Tools like PVsyst and dedicated horizon-profile instruments (the Solmetric SunEye is a common field tool) produce hourly shading heatmaps and loss trees that show exactly which panels lose how much production in each hour of the year. A methodology published on ScienceDirect recommends building a 3D scene with all nearby shading objects and running simulations that account for module orientation and bypass diode subdivision, because shadow pattern direction (parallel to a panel's short edge versus long edge) changes loss severity significantly.
A professional 3D shade analysis typically produces a shading loss percentage by month, an hourly heatmap, and a revised yield estimate. Lenders financing solar installations and some utility incentive programs require this level of documentation for borderline sites. For a solar panel campsite or portable setup, the same principle applies: position panels where the shade analysis shows the fewest obstructions.
Pro Tip: A simple DIY check is enough if your roof is clearly unobstructed. Order a professional analysis when shade is moderate or heavy, when a lender requires it, or when the installer's estimate seems optimistic compared to your own shadow observations.
| Assessment method | Best for | Output |
|---|---|---|
| Smartphone sun-path app | Quick first screen, clearly open roofs | Visual sun path overlay |
| Horizon photo + shadow timing | Moderate shade, DIY pre-screening | Rough shaded hours per day |
| Solmetric SunEye / LiDAR | Moderate to heavy shade, installer use | Hourly shading fraction per panel |
| PVsyst 3D simulation | Bankable yield estimate, lender reports | Annual loss %, performance ratio |
Mitigation hardware and design choices that reduce shading losses
The right hardware can recover a meaningful share of what shade takes away, but it costs more upfront.
MLPE: microinverters and DC power optimizers
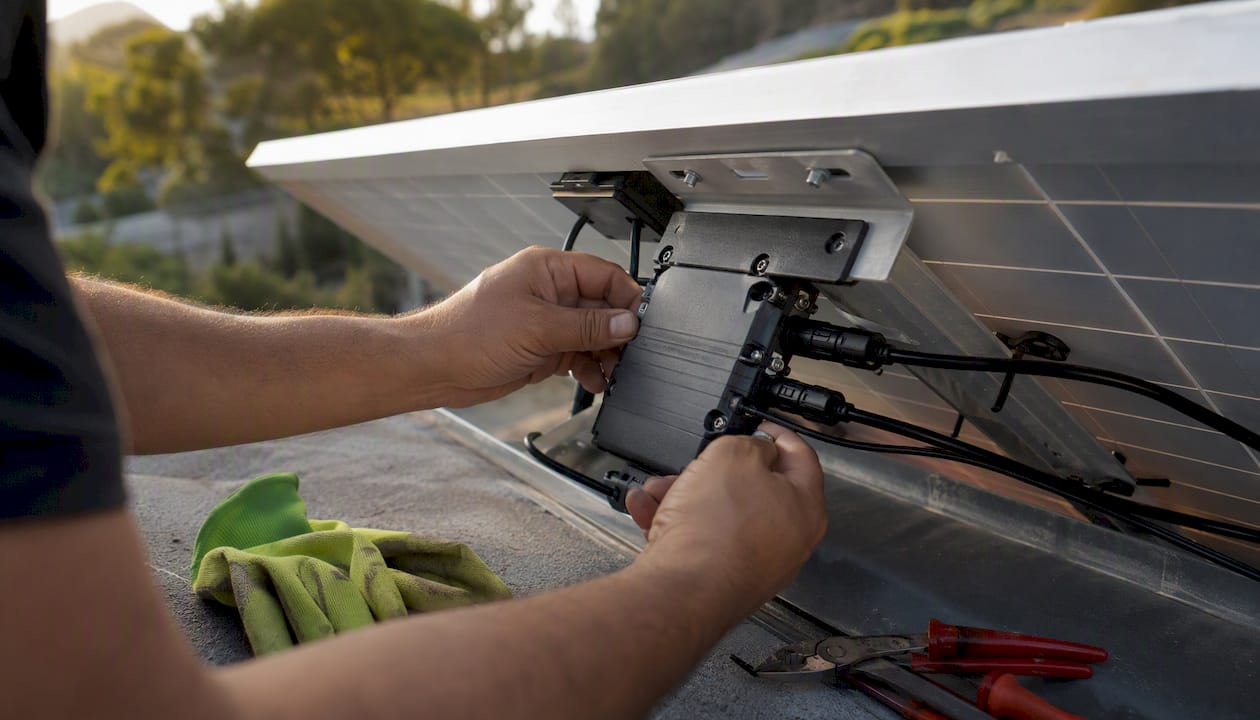
Module-level power electronics (MLPE) are the most effective hardware response to partial shading. A microinverter converts DC to AC at each panel independently, so a shaded panel can't drag down its neighbors. A DC power optimizer does the same job on the DC side before sending power to a central string inverter. SurgePV's design guide notes that MLPE or half-cut panels commonly recover a meaningful fraction of the 30–40% loss that shading 10% of panel area causes in string systems. The tradeoff: MLPE adds cost per panel and introduces more components that could require service over a 25-year system life.
Half-cut and shingled cells
Half-cut cells split each cell in two, doubling the number of bypass diode groups and halving the current per cell. This reduces resistive losses and limits how much output a single shadow event removes. Shingled panels go further, using overlapping cell strips with no gaps, which spreads current paths and reduces the impact of narrow shadows. Neither technology makes a shaded roof immune to losses, but both perform noticeably better than standard full-cell panels under partial shade.
Wiring and layout rules
Separating shaded and unshaded panels onto different MPPT (maximum power point tracking) inputs is one of the highest-impact design decisions on a shaded site. SurgePV's shading analysis guide is direct: never mix shaded and unshaded panels on the same string. Self-shading from row-to-row is also worth calculating; row spacing should account for your latitude and the low winter sun angles to avoid rows casting shadows on the row behind them.
Batteries and storage
A battery system doesn't reduce shading losses directly, but it changes how you use the power you do generate. On a shaded site that produces well only during a narrow midday window, a battery stores that peak output and shifts it to evening use, improving self-consumption. For heavily shaded roofs where total generation is low, storage alone doesn't fix the economics, but it does make a partial system more useful.
Pro Tip: If your installer proposes a string inverter for a shaded roof without mentioning separate MPPT inputs or MLPE, that's a design gap worth pushing back on.
What empirical research says about partial shading losses
The research is consistent: shading losses are nonlinear, and small obstructions cause outsized drops.
A full-scale experimental study found that a single-string PV module can lose roughly 90% of its output when one specific cell is entirely blocked.
Key findings from the research base:
- PV Education's analysis confirms that shading one cell in a series string reduces current for the entire string, with the shaded cell potentially dissipating power as heat if bypass diodes don't engage quickly enough
- MDPI Sustainability research shows that bypass diode configuration and inverter voltage-dependent efficiency curves interact under partial shading; adding more diode groups reduces local losses but shifts global maximum power points in ways that depend on the specific inverter model
- The same MDPI study found that inverter selection matters as much as panel selection for shaded sites, because some inverters degrade sharply at off-nominal voltages created by mismatched strings
- The ScienceDirect methodology paper recommends hour-by-hour 3D analysis over static calculations because bypass diodes engage reactively, meaning time-resolved modeling captures transient losses that snapshot methods miss
The practical takeaway from this body of work: detailed 3D analysis and MLPE are not upsells. For any site with moderate or heavy shade, they are the design choices the evidence supports.
Your step-by-step checklist before signing an installation contract
Use this list to stay organized and catch problems before they become expensive.
- Document your shade pattern. Photograph shadows at 9 AM, noon, and 3 PM on a clear day in each season, or at minimum in late fall.
- Estimate daily shaded hours. Count how many hours each proposed panel location is shaded during the core production window (9 AM to 3 PM).
- Ask for a module-level shading heatmap. Any installer quoting a shaded site should produce one. If they can't, ask why.
- Request MLPE options and separate MPPT inputs. Get a written comparison of string inverter versus microinverter or optimizer pricing and projected yield for your specific shade pattern.
- Get a bankable yield simulation for moderate or heavy shade. PVsyst or equivalent, with hourly shading fractions, not just a simple annual estimate.
- Ask about hotspot testing and warranty coverage. Confirm the panels carry a product warranty that covers hotspot damage and ask whether the installer tests for it during commissioning.
- Discuss maintenance. Tree pruning schedules, panel cleaning frequency, and snow removal plans all affect real-world output.
Red flags to watch for:
- Installer refuses to run a site-specific shade model
- Proposal mixes shaded and unshaded panels on the same string without explanation
- Installer promises full rated production despite visible shading
Pro Tip: Ask every installer: "What shading loss percentage did you use in this estimate, and how did you calculate it?" A confident, specific answer with a named tool is a good sign. Vagueness is not.
Practical alternatives when your roof is too shaded for rooftop solar
A heavily shaded roof doesn't mean solar is off the table. It means you need a different approach.
- Relocate the array on your property. A ground-mounted system in a sunnier part of your yard often outperforms a rooftop install on a shaded house. Ground mounts allow optimal tilt and azimuth, and you can clear obstructions more easily. Permitting requirements vary by municipality, so check local rules early.
- Community solar subscriptions. Many U.S. utilities now offer community solar programs where you subscribe to a share of an off-site solar farm and receive credits on your bill. No roof installation, no shade problem, and no upfront hardware cost. The Database of State Incentives for Renewables and Efficiency (DSIRE) lists available programs by state.
- Portable solar panels paired with battery storage. Deployable panels let you position generation where the sun actually reaches, whether that's a sunny patch of lawn, a deck, or a driveway. Paired with a solar-compatible backup power station, this setup covers essential loads during outages and reduces grid dependence without any roof work. For renters or homeowners in HOA-restricted neighborhoods, it's often the only practical solar option.
- Hybrid approach. Install a small rooftop array on the least-shaded section of your roof, then supplement with portable panels during peak sun hours. This captures whatever rooftop potential exists while giving you flexibility to add generation capacity as your needs change.
For portable panel options and how they work, Toddra's folding panel guide covers the mechanics and use cases in practical detail.
Quantitative guidelines on tolerable shade duration
Most solar professionals use a practical threshold of no more than one to two hours of shading per day during the core production window (9 AM to 3 PM) for a rooftop system to remain financially viable without MLPE. Beyond that, the math shifts.
With a standard string inverter, even brief shading events during peak irradiance hours cause disproportionate losses because those hours carry the highest energy density. An hour of shade at noon costs more production than an hour at 8 AM. For sites where shading occurs primarily in early morning or late afternoon (before 8 AM or after 4 PM), the impact on annual yield is much smaller and a standard string system may still be cost-effective.
For MLPE systems, the tolerable threshold extends further. Because each panel operates independently, two to four hours of partial shading daily on a portion of the array may still yield an acceptable payback period, depending on your electricity rate and local incentives. The key word is "partial": if the entire array is shaded simultaneously for extended periods, MLPE provides no advantage over a string system.
How panel technology affects shade performance
Not all panels respond to shade the same way, and the differences are worth understanding before you choose.
Their higher efficiency means more watts per square foot, which matters on a small or partially shaded roof. However, standard monocrystalline panels with three bypass diode groups are no more inherently shade-tolerant than polycrystalline panels with the same diode configuration.
They are generally less expensive per panel, but their lower efficiency means you need more panels to hit the same output, which can be a problem on a constrained or shaded roof where space is already limited.
Half-cut monocrystalline panels are the current sweet spot for shaded installations. Cutting each cell in half doubles the bypass diode groups and reduces resistive losses, so a shadow event removes a smaller fraction of total output. Most premium installers now default to half-cut cells for any site with non-trivial shading.
Thin-film panels (such as CdTe or CIGS) respond to partial shade differently from crystalline silicon. Their lower efficiency and different cell architecture mean they are rarely the right choice for residential rooftops, but they do tend to perform relatively better under diffuse light conditions.
The practical guidance: for a shaded U.S. rooftop, half-cut monocrystalline panels with MLPE represent the most reliable combination the current market offers.
How partial shade affects battery storage integration
Partial shading changes the charging profile of any battery system connected to your array, and that matters for how you size storage.
A shaded array produces power unevenly across the day. Instead of a smooth bell curve peaking at solar noon, you may see a jagged profile with gaps when shadows cross the array. A battery management system (BMS) handles this variability well, but the total energy available to store is still limited by what the panels actually generate. Shading doesn't damage batteries, but it does mean a smaller, more irregular charge cycle.
For homeowners pairing solar with a battery backup system during grid-down scenarios, shading is a real planning factor. If your panels are shaded during the hours you most need to recharge, your battery may not recover fully before the next discharge cycle. Sizing the battery larger than a standard calculation suggests is a reasonable buffer for shaded sites.
LiFePO4 batteries, which Toddra's portable power stations use, handle partial and irregular charging well. Their chemistry tolerates partial state-of-charge cycling better than older lithium-ion chemistries, which makes them a practical match for the uneven generation profile a shaded array produces.
Cost-benefit analysis: mitigation technology versus relocation
The financial question is straightforward: does the cost of shade mitigation recover more value than it costs, compared to simply moving the array?
MLPE upgrade cost typically adds $0.20–$0.50 per watt to a system, or roughly $600–$1,500 on a 3 kW array. That math works.
Ground-mount relocation costs more upfront (trenching, racking, permitting) but delivers full unshaded production. For heavily shaded roofs where even MLPE can't rescue the economics, a ground mount in a sunny corner of the property often has a shorter overall payback than a shaded rooftop install with premium hardware.
Portable solar plus battery has the lowest upfront cost and zero permitting friction. It doesn't replace a full rooftop system's output, but for homeowners with severely shaded roofs or rental properties, it delivers real value without a long-term commitment. The flexibility to reposition panels as seasons change is a genuine advantage that fixed systems can't match.
The honest answer: if shading is light to moderate, MLPE pays for itself. If shading is heavy, relocation or a portable system is usually the better financial decision. A professional 3D shade analysis, which typically costs a few hundred dollars, gives you the numbers to make that call with confidence rather than guesswork.
A realistic perspective on shade tolerance and what it actually costs you
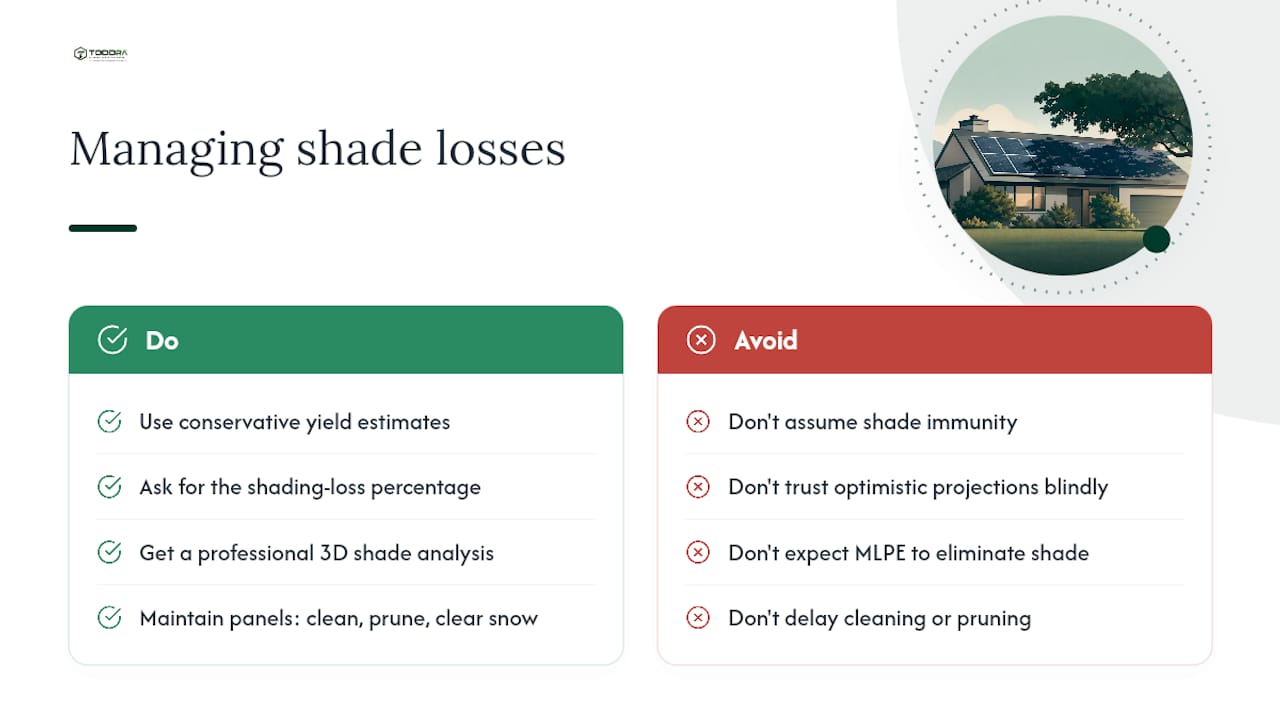
Shade tolerance is not shade immunity. That distinction gets blurred in a lot of solar marketing, and it costs homeowners real money when they discover the difference after installation.
The hardware improvements of the last decade, half-cut cells, microinverters, DC optimizers, are genuine and meaningful. They recover a real fraction of what shade takes away. But they work by limiting damage, not eliminating it. A roof that is shaded for four hours a day during peak production hours will underperform a clear roof by a significant margin regardless of which panels or inverters you choose. No amount of MLPE changes the physics of a shadow.
The most reliable protection is a conservative yield estimate from the start. When an installer's production projection looks optimistic relative to your own shadow observations, trust your eyes. Ask for the shading loss percentage used in the model and compare it to what you actually measured. A professional 3D analysis is worth every dollar on a borderline site because it replaces optimism with data.
Maintenance is also underrated as a financial lever. Keeping panels clean, pruning trees that are growing into the solar window, and clearing snow promptly in winter are simple actions that cost little and protect the production you paid for. On a shaded site where every kilowatt-hour matters, a dirty panel or an encroaching branch is a problem worth fixing the same week you notice it.
Portable solar and battery backup from Toddra for shaded homes
For homeowners whose roofs are too shaded for a rooftop system to pencil out, a portable solar and battery setup gives you real energy independence without the installation headaches. You position the panels where the sun actually reaches, whether that's a sunny patch of lawn, a south-facing driveway, or an open deck, and store the energy in a compact, reliable power station.
Toddra's portable power stations use LiFePO4 battery chemistry, which handles the irregular charging profile of a shaded or partially shaded array better than standard lithium-ion. Smart BMS protection, fast charging, and solar compatibility are built in, so you're not piecing together a system from mismatched components. It's a practical fit for renters, homeowners in HOA-restricted neighborhoods, or anyone who wants a backup energy source without committing to a permanent roof installation.
Browse Toddra's portable power stations and solar generators to find the right capacity for your home's essential loads, or check out the Jackery Battery Pack 5000 Plus for a high-capacity expansion option that pairs well with portable solar panels on shaded properties.
Primary sources and further reading
These are the core references behind the guidance in this article. Each is worth reading if you want more technical depth.
- Do Solar Panels Need Direct Sunlight? — SolarReviews — Homeowner-facing overview of how shading duration, panel technology, and inverter type interact to determine real-world output.
- How Shading Affects Solar Panels — SurgePV — Practical field and design guide with loss figures and mitigation recommendations for installers and homeowners.
- Partial shading, bypass diode configuration and inverter efficiency — MDPI Sustainability — Research on how diode configuration and inverter voltage curves interact under partial shading; useful for evaluating system design choices.
- Shading prediction methodology — ScienceDirect — Recommended approach for 3D scene modeling and hourly shading simulation; explains why module orientation and bypass diode subdivision matter for accuracy.
For borderline cases: a professional 3D shade analysis using PVsyst or a Solmetric SunEye survey is the single most reliable way to get a bankable yield estimate before committing to a rooftop installation. Most reputable installers offer this service; if yours doesn't, consider it a red flag worth acting on.
Sources
- Impacts of shadow conditions on solar PV array performance: A full-scale experimental and empirical study
- Do Solar Panels Need Direct Sunlight To Work? — SolarReviews
- Partial shading, bypass diode configuration and inverter efficiency effects on PV system performance — MDPI Sustainability
- How Shading Affects Solar Panels — SurgePV