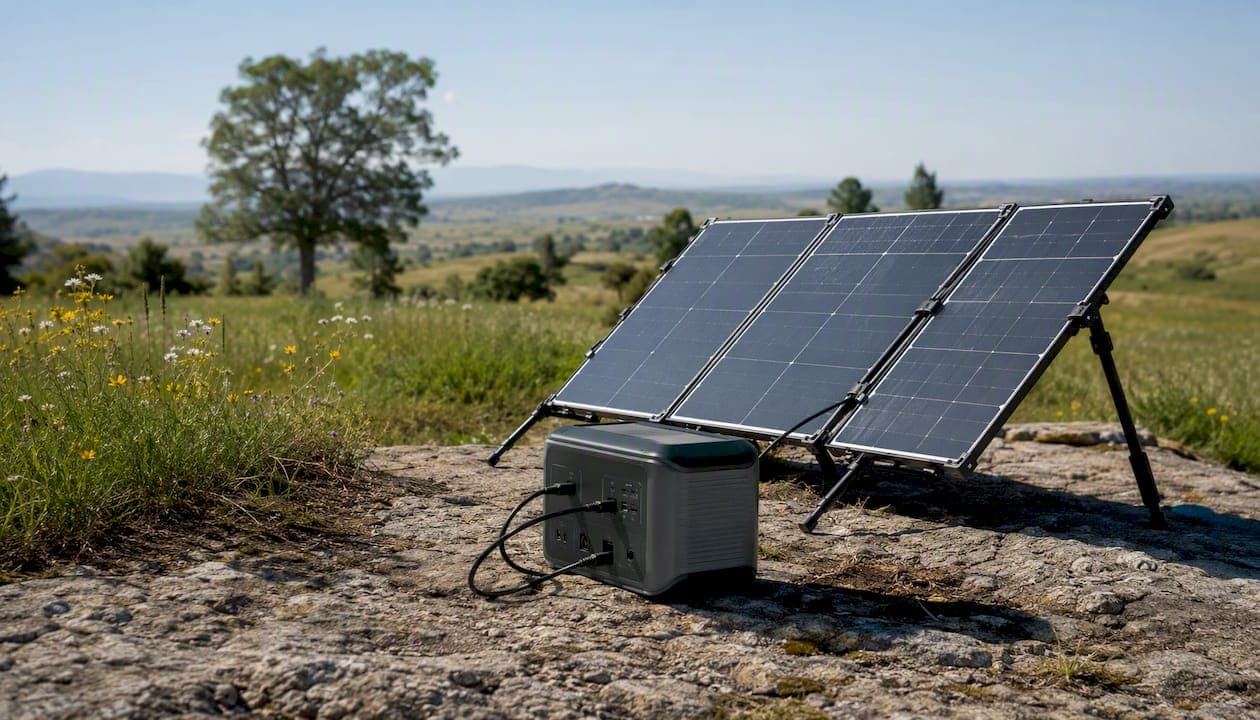
The fastest, safest route to reliable 120V AC from solar for most DIYers is a LiFePO4-equipped portable power station paired with a compatible solar panel. For permanent shed wiring or extended off-grid use, an off-grid or hybrid inverter kit with a battery bank is the right step up. According to DIY Solar Power Forum practitioners, these two paths cover the vast majority of real-world use cases safely and without specialized electrical training.
Here is what each option gives you at a glance:
- Portable power station (solar generator): Plug-and-play 120V AC outlets, integrated MPPT and BMS, no wiring permits for most setups, ideal for sheds, camping, and emergency backup.
- Off-grid or hybrid inverter kit: Permanent hardwired 120V for a shed or small structure, supports multiple circuits, scales with added battery capacity.
- Grid-tied microinverter or plug-in kit: Supplements your utility bill by feeding power back to the grid but provides zero backup during outages due to anti-islanding shutdown.
Key Takeaways
A portable power station with LiFePO4 chemistry is the safest, fastest route to reliable 120V solar power for most DIYers, with a permanent off-grid kit reserved for multi-circuit or full-time shed use.
| Point | Details |
|---|---|
| Choose portable for most cases | A LiFePO4 portable power station delivers 120V AC from solar with no wiring permit for most standalone uses. |
| Use a hybrid kit for permanent sheds | Hardwired 120V solar power systems need an MPPT controller, pure-sine inverter, battery bank, and a transfer switch per NEC. |
| Never plug panels into a house outlet | Direct panel-to-outlet connections are unsafe and a code violation; anti-islanding also cuts grid-tied systems during outages. |
| Size inverter and battery to peak load | Match inverter continuous watts to your load, add surge headroom, and calculate battery Wh from runtime needs plus 20–25% buffer. |
| Toddra for a ready-to-buy solution | Toddra's portable power stations and the Jackery 5040 Wh expansion battery cover small through heavy DIY 120V solar builds. |
Table of Contents
- Which approach fits your 120V solar use case?
- What components make 120V AC from solar?
- How to size a 120V solar system for your needs
- Can you plug a solar panel directly into a house outlet?
- What are the easiest product routes for DIY 120V solar?
- Quick installation checklist for portable and permanent setups
- What does a 120V solar setup cost, and how long does it take?
- Why portable power stations are often the smartest first buy
- Toddra portable power stations: a ready solution for 120V solar
- Sources
Which approach fits your 120V solar use case?
Three system families cover nearly every DIY scenario, and choosing the wrong one is the most common and most expensive mistake buyers make.
Portable power station (solar generator)
This is the all-in-one unit: a LiFePO4 battery, MPPT charge controller, pure-sine-wave inverter, and BMS packed into a single enclosure. You connect solar panels to the DC input, and the 120V AC outlets are ready to use. No wiring permits, no separate components to match.
Best for: Short-term power tool use, shed lighting, campsite power, emergency home backup, and anyone who wants to start using solar today without an electrician.
- Pros: Simple setup (hours, not days), portable, integrated safety features, no permit required for most portable uses.
- Cons: Capacity is fixed to the unit (though expansion batteries exist), higher cost per watt-hour than a DIY battery bank.
Off-grid or hybrid inverter kit
This approach uses separate components: solar panels, an MPPT charge controller, a battery bank (LiFePO4 strongly recommended), and a standalone pure-sine-wave inverter. A hybrid inverter can also accept grid power as a backup charging source.
Best for: Permanent shed installations, running a small refrigerator continuously, powering multiple circuits, or any setup where you need 120V AC around the clock.
- Pros: Scalable, lower cost per watt-hour at larger capacities, supports hardwired outlets and sub-panels.
- Cons: Requires more planning, proper cable sizing, breakers, and often a permit for permanent wiring.
Grid-tied microinverter or plug-in kit
Plug-and-play wall-plug kits connect a PV panel to a standard 120V outlet and feed power back into your home's circuits. They are grid-tied, which means they require a live utility signal to operate.
Best for: Reducing your electricity bill with minimal installation effort.
- Pros: Very simple to set up, no battery needed.
- Cons: Zero backup power during outages. Grid-tied microinverters implement anti-islanding and shut down the moment utility power drops.
Pro Tip: Never buy a grid-tied microinverter expecting backup power. If your goal is to keep the lights on during an outage, you need a portable power station or an off-grid inverter with its own battery.
What components make 120V AC from solar?
A working 120V solar power system has six core parts. Understanding each one helps you compare kits honestly and avoid undersized components.
- Solar panels: Convert sunlight to DC electricity. Panels can be wired in series (higher voltage, same current) or parallel (same voltage, higher current). Your MPPT controller's input voltage range determines which configuration works.
- MPPT charge controller: Converts the panel's variable DC output to the correct charging voltage for your battery. MPPT controllers are significantly more efficient than PWM types, especially in partial shade or cold weather.
- Battery bank (LiFePO4 recommended): Stores energy for use when the sun is not shining. LiFePO4 chemistry offers superior cycle life and safety for repeated deep cycling compared with older lead-acid types. Running appliances directly from panels without a battery causes voltage flicker and can damage sensitive electronics during cloud transients.
- Pure-sine-wave inverter: Converts battery DC to 120V AC. Always choose pure sine over modified sine for appliances with motors, compressors, or sensitive electronics. Check both the continuous watt rating (what it sustains) and the surge rating (what it handles for 1–2 seconds at startup).
- Breakers, fuses, and transfer switch: Protect wiring and prevent backfeed to the grid. For any hardwired installation, a transfer switch or interlock is required by the National Electrical Code (NEC) to isolate your system from utility lines.
- Wiring and connectors: MC4 connectors are standard for PV panel connections. Cable gauge must match current load; undersized wire is a fire risk. A step-by-step Instructables build demonstrates the wiring decisions required for a functional DIY 120V outlet.
For portable power stations, all of these components except the panels are already integrated. For LiFePO4 battery advantages in outdoor and off-grid use, the chemistry's thermal stability and long cycle life make it the preferred choice for both portable and permanent setups.
How to size a 120V solar system for your needs
Sizing starts from your load, not from the panels. Work through this sequence:
- List your appliances and their wattages. Add up the continuous watts you plan to run simultaneously. That total is your minimum inverter continuous rating.
- Add surge capacity. Motors (refrigerators, power tools, pumps) draw 2–3x their running watts at startup. Your inverter's surge rating must cover the highest single-device startup load.
- Calculate battery capacity (Wh). Multiply your total continuous watts by the hours you need to run without sun. Add 20–25% to account for inverter losses and avoid fully depleting the battery.
- Estimate daily panel wattage. Divide your daily Wh need by your location's average peak sun hours (typically 4–5 hours in most of the continental U.S.), then add 25% for system losses. Starting from your actual kWh use gives a more accurate panel count than any rule of thumb.
Three example builds
These ranges are parts-only estimates for DIY builds. A portable power station covering the small or medium build often costs less than a custom kit once you factor in wiring, enclosures, and labor.
Can you plug a solar panel directly into a house outlet?
No. Plugging a solar panel or an uncertified inverter into a standard household outlet is unsafe and, in most U.S. jurisdictions, a code violation. Here is why it matters and what to do instead.
Anti-islanding explained: Grid-tied microinverters require a live utility AC signal to synchronize their output. When the grid goes down, they detect the loss and shut off within milliseconds. This protects utility workers from backfed power on lines they believe are dead. It also means your solar system goes dark exactly when you need it most.
What the NEC requires for DIY installs:
- A transfer switch or approved interlock kit to physically prevent your inverter from connecting to utility lines simultaneously.
- Properly rated breakers and fuses on both the DC (panel) side and the AC (inverter) side.
- UL or ETL-listed equipment for any grid-connected or permanently wired installation.
- A permit and inspection for hardwired systems in most U.S. states and municipalities. Portable power stations used as standalone units generally do not require a permit.
Export and liability: Feeding power back to the grid without utility approval and a net-metering agreement can void your homeowner's insurance and expose you to liability if a fault occurs. Keep grid-tied exports within your utility's approved program.
Pro Tip: If you want safe backup power without complex wiring, choose a portable power station or an off-grid inverter with a built-in AC transfer function. These units create their own AC reference and operate independently of the grid. For deeper guidance on solar charging during grid-down scenarios, the practical steps are straightforward once you have the right equipment.
What are the easiest product routes for DIY 120V solar?
For most non-certified DIYers, the portable power station category is the lowest-risk, fastest-to-deploy option for getting 120V from solar.
Portable power stations
A quality portable power station integrates MPPT charging, a pure-sine-wave inverter, LiFePO4 battery, and BMS protection in one unit. You connect your solar panels to the DC input port, and the 120V AC outlets work immediately. There is no wiring to size, no separate charge controller to configure, and no transfer switch needed for standalone use.
Look for these specs when comparing units:
- LiFePO4 battery chemistry (not Li-ion or lead-acid)
- MPPT solar input with a stated maximum panel wattage and voltage range
- Pure-sine-wave inverter with a continuous watt rating that covers your load
- UL or ETL listing for the unit itself
For a full breakdown of what to look for, the portable power station guide covers specs and comparisons in detail.
Plug-and-play wall-plug kits
These kits connect a PV panel to a 120V outlet and feed power into your home's circuits. They are grid-tied, so anti-islanding applies. They work well for reducing your electricity bill but offer no backup capability.
Compact off-grid kits (AIO hybrid inverters)
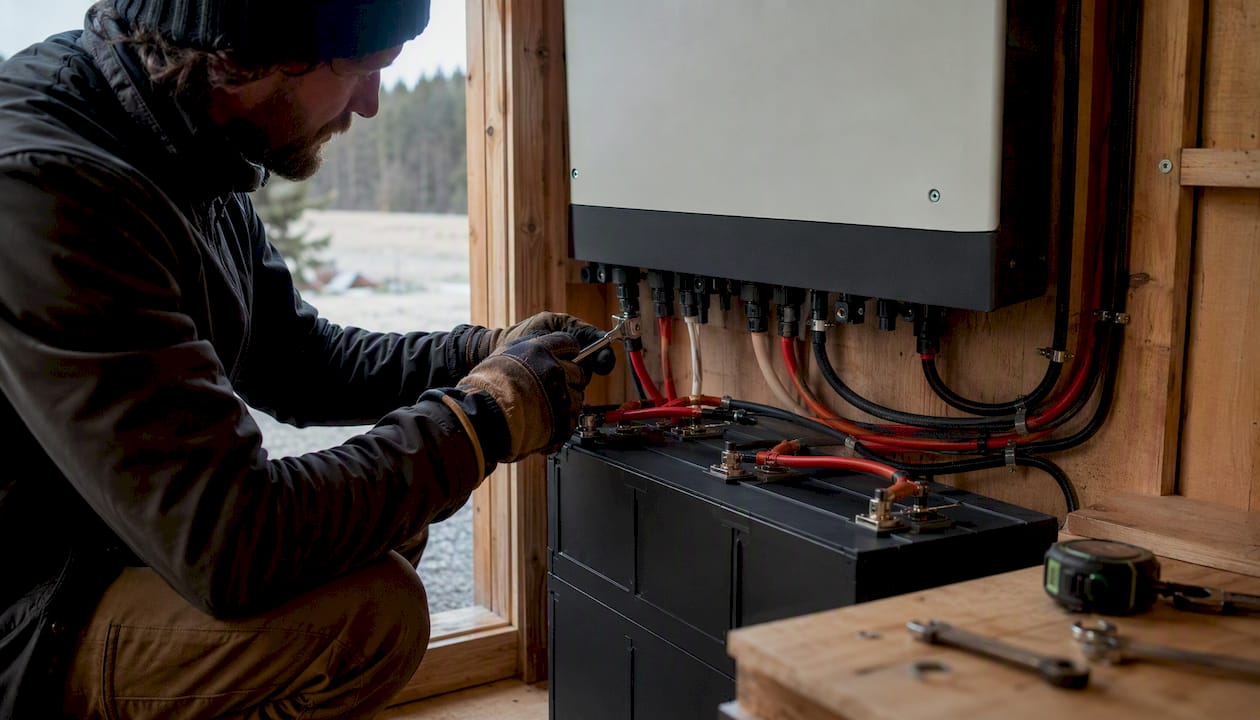
For a permanent hardwired shed installation, an all-in-one (AIO) hybrid inverter combines MPPT charging and a pure-sine inverter in one box. Pair it with a LiFePO4 battery bank and you have a complete, expandable 120V solar power system. Key specs to verify: MPPT input voltage range, inverter continuous and surge wattage, and battery bank compatibility. Understanding how off-grid homes work helps when planning a permanent installation.
Quick installation checklist for portable and permanent setups
Portable power station setup
- Position panels at the correct tilt angle for your latitude (roughly equal to your latitude in degrees, facing south).
- Route PV cables away from foot traffic and sharp edges; use MC4 connectors and check polarity before connecting.
- Verify the panel's open-circuit voltage (Voc) is within the station's MPPT input range before plugging in.
- Connect panels to the station's solar input port and confirm the charge indicator activates.
- Test the 120V AC outlets under load before relying on the system; start with a small appliance to verify inverter output.
- Check battery state of charge monthly during storage and avoid leaving the unit fully discharged for extended periods.
For detailed wiring steps, connecting solar panels to a power station safely walks through each connection point with safety notes.
Permanent off-grid inverter installation
- Prepare the site: mount the inverter and battery bank in a dry, ventilated enclosure away from direct sunlight.
- Mount solar panels securely on the roof or ground mount; confirm structural load capacity.
- Run DC wiring from panels to the charge controller using appropriately sized cable (check voltage drop over the run length).
- Wire the battery bank to the inverter per the manufacturer's diagram; install a properly rated DC fuse within 18 inches of the battery terminals.
- Connect the inverter's AC output to your distribution panel through a transfer switch or interlock.
- Pull the required permit and schedule an inspection before energizing the AC distribution side.
Pro Tip: Always test your inverter under a real load before closing up the enclosure. A 1,000W inverter that trips under a 900W load has a wiring or grounding problem, not a capacity problem. Catching it during commissioning saves hours of troubleshooting later.
What does a 120V solar setup cost, and how long does it take?
Cost ranges
- Entry-level portable power station + 100W panel: $300–$700 for a small-build unit with one panel. Setup takes 1–3 hours.
- Mid-range portable station + 400W panel array: $900–$2,000 for a medium-build unit. Still a same-day setup.
- Compact off-grid AIO kit (permanent shed): $1,500–$3,500 for parts, plus $500–$2,000 for licensed electrician labor if you hire out the AC distribution and transfer switch work.
- Full heavy-use off-grid shed system: $3,000–$6,000+ in parts, with permitting and inspection adding $200–$800 depending on your municipality.
Timeline
- Portable power station: unbox, connect panels, and run loads the same day.
- Plug-and-play wall-plug kit: a half-day to a full day including mounting and outlet connection.
- Permanent hybrid inverter install: 2–5 days for the physical work, plus 2–6 weeks for permit approval in many U.S. counties.
Factors that push cost and timeline up:
- Long cable runs between panels and the inverter (larger wire gauge required)
- Multi-day battery integration with a large LiFePO4 bank
- Local permit requirements and inspection scheduling delays
- Roof mounting versus ground mounting (structural assessment needed for roof)
- Adding a sub-panel or multiple circuits to the shed
Why portable power stations are often the smartest first buy
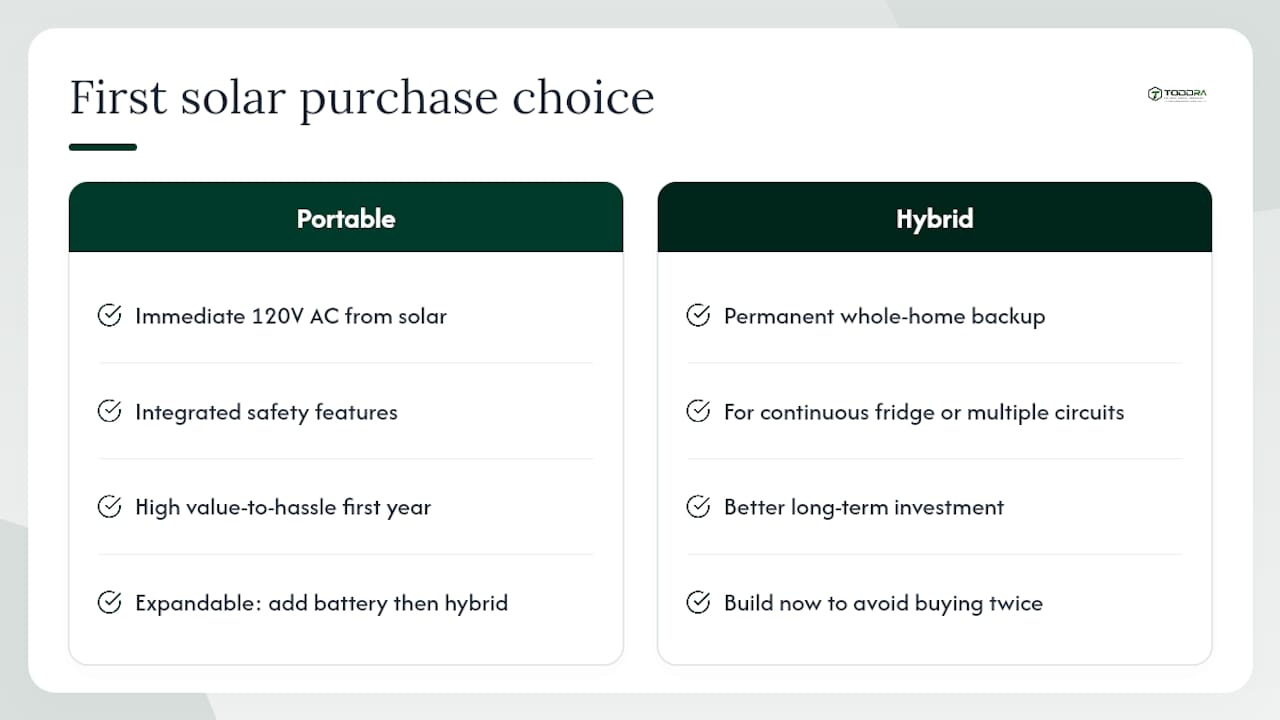
Most DIYers overestimate how much system they need on day one and underestimate how much wiring complexity costs in time and frustration. A portable power station sidesteps both problems. It delivers reliable 120V AC from solar immediately, with integrated safety features that a custom-built system takes real skill to replicate. The value-to-hassle ratio is genuinely hard to beat for the first year of solar ownership.
That said, there are clear signals that a permanent hybrid system is the better investment from the start. If you need to power a full-size refrigerator continuously, run multiple circuits in a shed, or plan to expand to a whole-home backup system within two years, the portable station becomes a stepping stone rather than a destination. Build the permanent system now and avoid buying twice.
The upgrade path is logical: start with a portable station for immediate needs, add an expansion battery when runtime falls short, and graduate to a hybrid inverter with a hardwired battery bank when your load outgrows what a portable unit can handle. Each step builds on the last without wasted hardware.
Toddra portable power stations: a ready solution for 120V solar
If you want a purchase-ready path to 120V solar power without the complexity of a custom build, Toddra's portable power station lineup is built for exactly this use case. Every unit features LiFePO4 battery chemistry for long cycle life, built-in MPPT compatibility for direct solar panel input, and a pure-sine-wave inverter for safe appliance use. US-based customer support and a clear warranty back every purchase.
For the heavy-use build described in the sizing section, the Jackery Battery Pack 5000 Plus Expansion Battery (5040 Wh) available at Toddra is a strong example of the high-capacity expansion storage that makes multi-circuit or extended off-grid use practical. At 5,040 Wh, it matches the battery target for the heavy example build and pairs with compatible solar generators for a scalable, expandable system.
Visit Toddra's product pages to find the right portable power station or expansion battery for your shed, appliance, or off-grid setup.
Sources
The sources below underpin the advice in this article. Practical build guides are marked; sizing and product references are noted separately.
- Direct solar to 120V outlet | DIY Solar Power Forum
- Solar Powered AC110-120V Outlet : 5 Steps - Instructables
- How Many Solar Panels Do I Need? (2026 Guide) - Nexamp
- Can a panel generate enough voltage to run 120 volts without batteries | DIY Solar Power Forum